Microsoft Azure IoT Development Tutorial
Microsoft Azure IoT Development Tutorial
Microsoft Azure, AWS Cloud, and Google Cloud are international cloud service providers offering services such as cloud computing, Internet of Things (IoT), and AI. This tutorial will focus on the practical application of using Microsoft Azure to connect IoT devices for program execution and data collection.
Azure Login and IoT Hub Setup
First, we need to log in to the Azure cloud: https://portal.azure.com. Azure provides some always-free services for every account, which include the IoT Hub related to the Internet of Things.
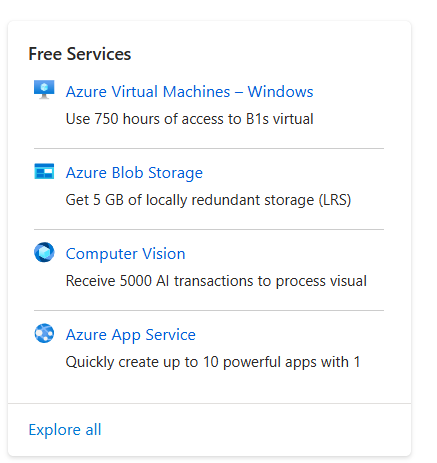
We can find Microsoft IoT Hub under free services and click create, as shown in the figure.
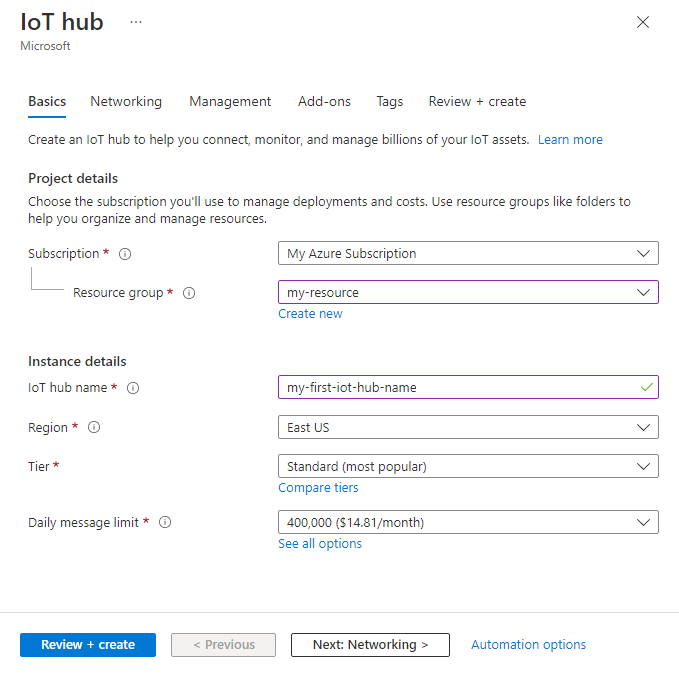
Here, we can customize the IoT hub name and then select our Resource Group. Regarding the Subscription and Resource Group, you generally need to create a Subscription and a Resource Group within it before creating any resources. So, if this is your first time using Azure, it will prompt you to create these two at the beginning; don’t worry. For the Tier section, select “Free”, and for the Region section, selecting “East Asia”, which is closer to us, will suffice.
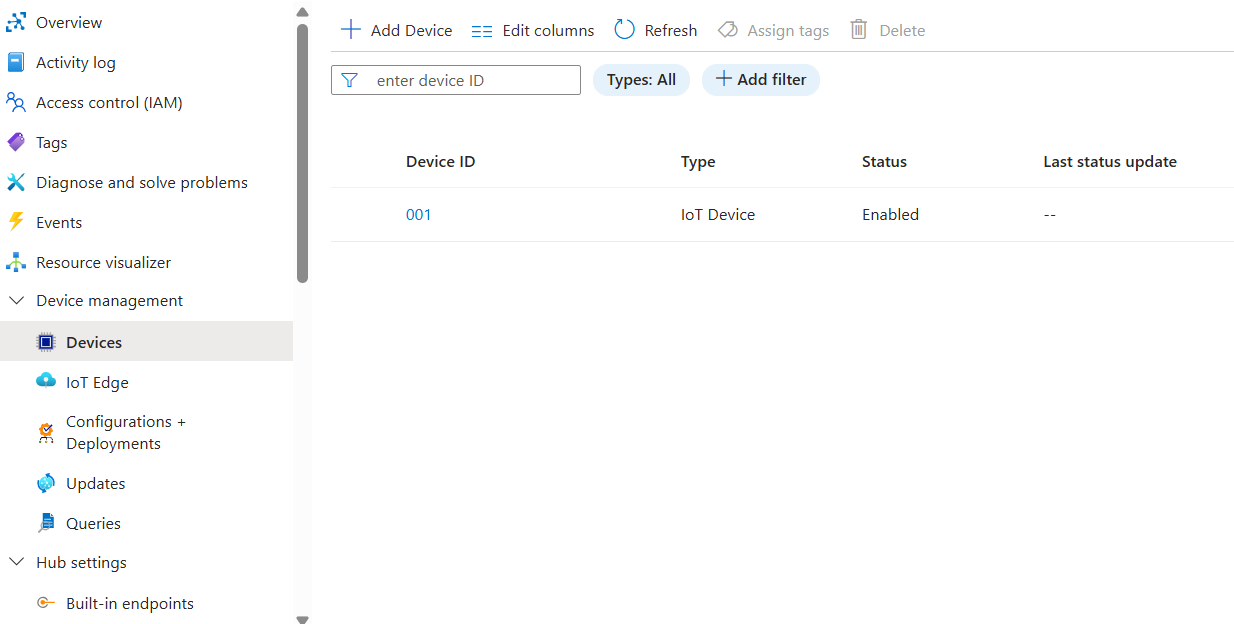
After creating it, we open it, click on “Device Management” in the left column, and then click on “Devices”. As shown in the figure, we add a device.
After clicking into it, we specify the device name and temporarily leave “IoT edge device” unchecked. As shown in the figure,
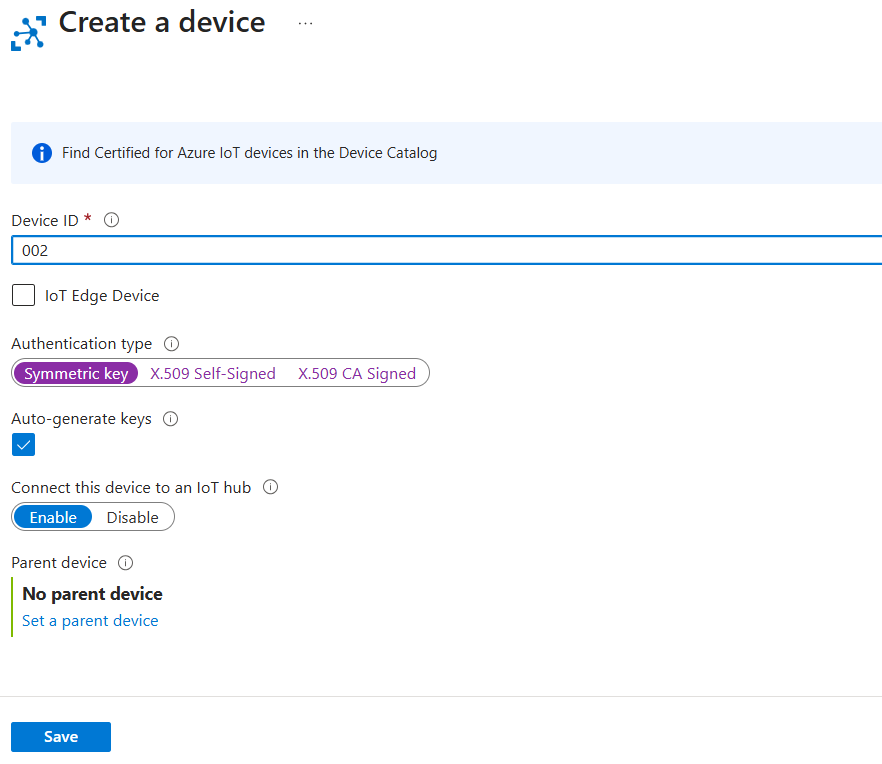
Let’s briefly distinguish the difference here:
IoT Edge Device is the most basic mode, and it is also the mode currently used by your Raspberry Pi simulation code. It is only responsible for collecting data and then sending it intact to the Azure IoT Hub (cloud) via the MQTT/AMQP protocol.
When Unclicking IoT Edge Device, it can not only send and receive data but also run containers. You can package cloud logic (such as Azure Functions, Stream Analytics, or even AI models) into Docker containers and deploy them directly to run on this device. At this point, as an edge computing device, it can also serve as a gateway for other IoT devices connecting to the cloud.
In addition, we choose symmetric key as the Authentication method here, which is the simplest one. The latter two are the self-signed X509 certificate (which is a self-signed certificate) and the CA signed X509 certificate (which is a certificate issued to the device by a CA). Both of the latter two use Public Key Infrastructure (PKI) for device authentication. We are not concerned with the authentication method here, so we choose the first one and simply use key authentication.
After successfully creating the device, we click to view its interface, as shown in the figure:
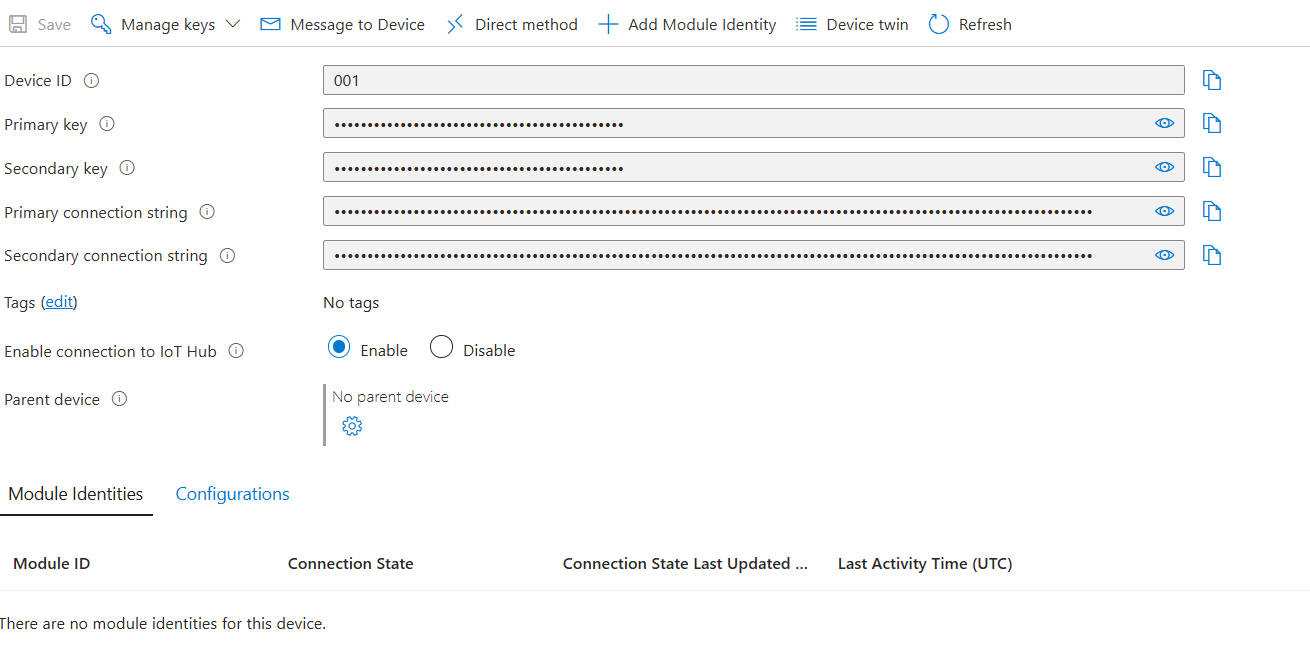
The primary connection string and device here will be used for the connection. The Primary connection string corresponds to the primary key used in API calls.
Run the IoT Device (Simulation) and Connect to the IoT Hub
For convenience here, we will directly use the simulated IoT device provided officially by Azure, as well as the simulated data collection process. The simulator page is as follows: https://azure-samples.github.io/raspberry-pi-web-simulator/#Getstarted
The code is shown in the figure:
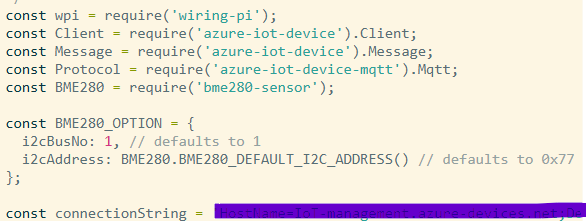
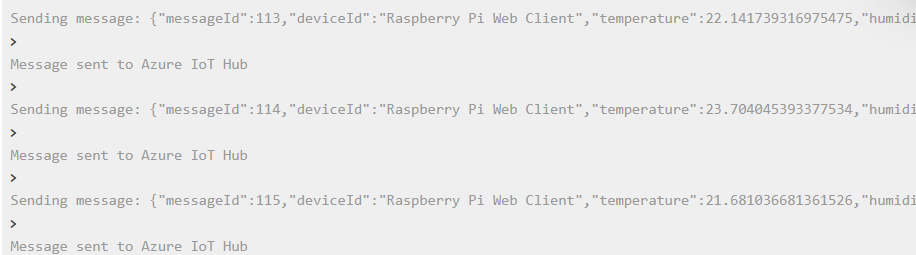
In the code provided by the simulator, we need to replace the connection string with the primary connection string mentioned earlier. Then simply click run, and the sensor will transmit data to the IoT hub. The sensor log is shown in the figure:
We can also use Python script to send IoT data to the IoT hub.
Visualize Sensor Data
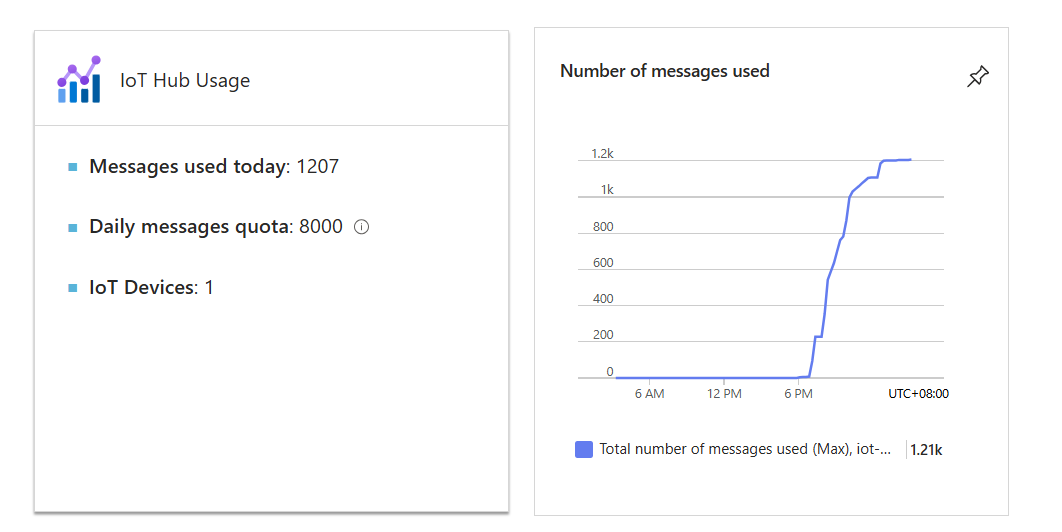
Note that our IoT hub cannot directly display the data content; it can only display the number of messages sent over, as shown in the figure:
So next, we will create another web app in Azure to display our sensor data. We click on Azure in the top left to return to the main interface as shown in the figure,
Then open “App Services” and create a web app. We do not need a database here for the time being.
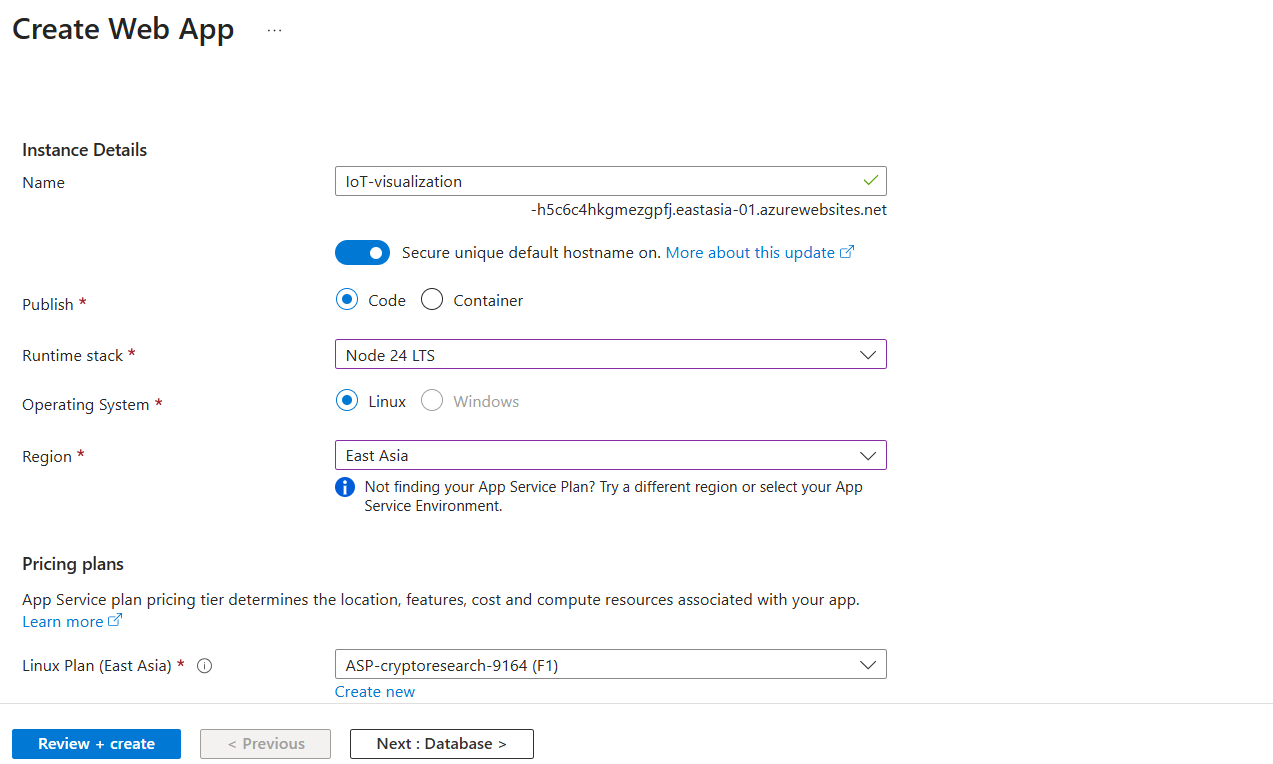
As shown in the figure, there will be Subscription and Resource Group at the top. We should try to choose the same options as before. For the Publish mode, we select “Code”; for the Runtime stack, we select “Node 24 LTS” because the code provided by the IoT device simulator is based on NodeJS. For Region, we still select “East Asia”, and in the pricing plan below, we select “Free” to save money.
After it is created, we need to create a web page project on this web app to display our sensor data. We will also use Azure’s page template, and the project address is: https://github.com/Azure-Samples/web-apps-node-iot-hub-data-visualization.git. Here we will use git operations to pull down and push to the web app environment we just created. The commands are as follows: (Do not execute them yet; we first need to configure some environment variables using the Azure web app interface)
1 | git clone https://github.com/Azure-Samples/web-apps-node-iot-hub-data-visualization.git |
Now let’s configure the environment variables. Open the management interface of the web app you just created in Azure, find “Settings” in the left column, and click on “Environment variables” as shown in the figure.
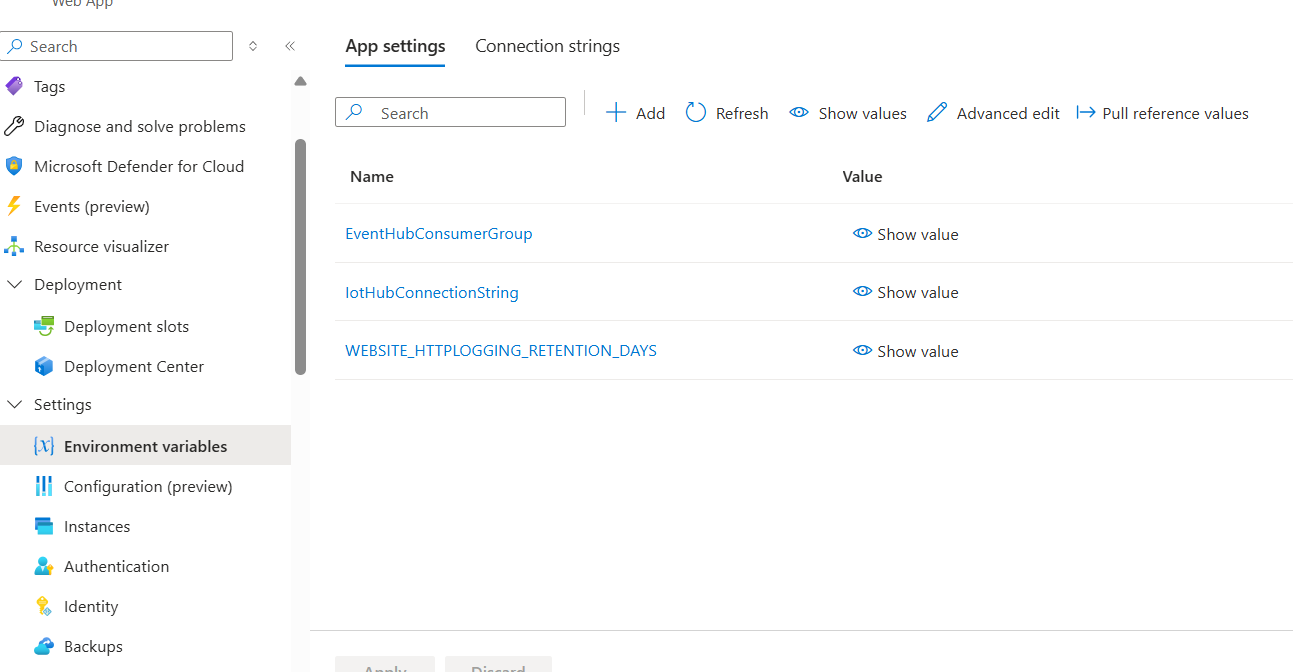
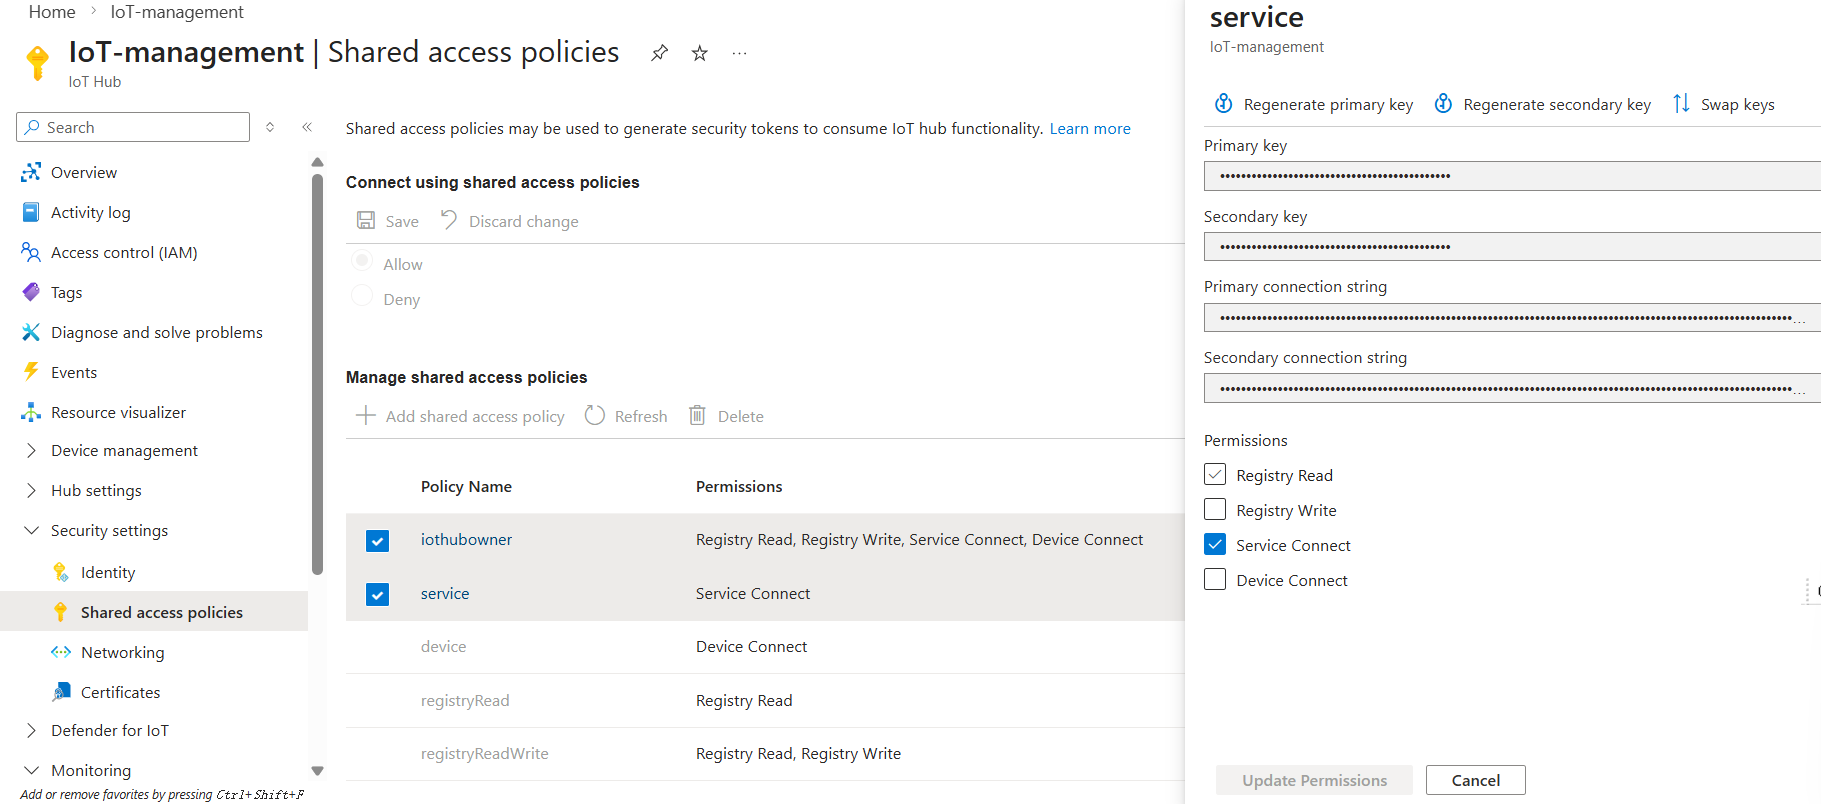
(There should be nothing there; my screen shows it after configuration). We need to add two items: IotHubConnectionString and EventHubConsumerGroup. For IotHubConnectionString, open the security settings in the IoT hub we created at the very beginning, find “Shared access policies”, and then click “service”. As shown in the figure, the primary connection string will appear; that’s it!
For EventHubConsumerGroup, we also need to open the IoT hub, then find “Hub settings”, then find “Built-in endpoints”. Then, in the Event Hub Details, we find “Consumer groups” and create a group. Here I named it “monitoring”, as shown in the figure.

Now, returning to the web app, we need to set up the authentication method. Authentication is required when doing a local git push upstream.
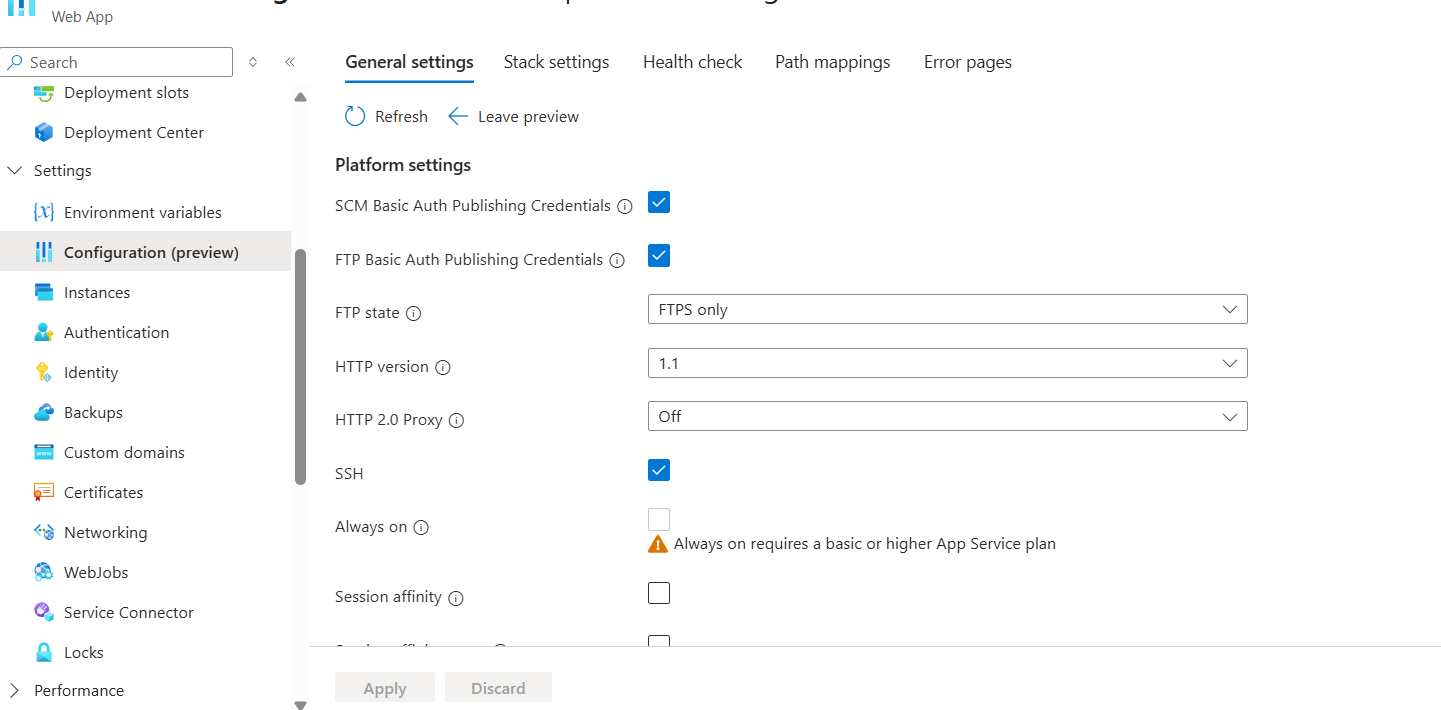
As shown in the figure, we need to open “Configuration” under settings and check both SCM and FTP. Then we open “Deployment Center” under Deployment and find the “Credentials” tab on the far right, as shown in the figure:

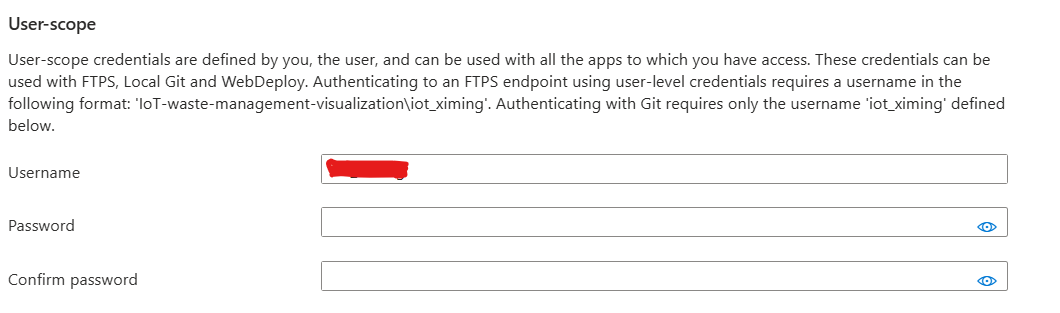
Then, in the “User scope” below, create a username and password to be used for authentication during the push process, as shown in the figure:
Once created, everything is ready. We start executing the following commands:
1 | git clone https://github.com/Azure-Samples/web-apps-node-iot-hub-data-visualization.git |
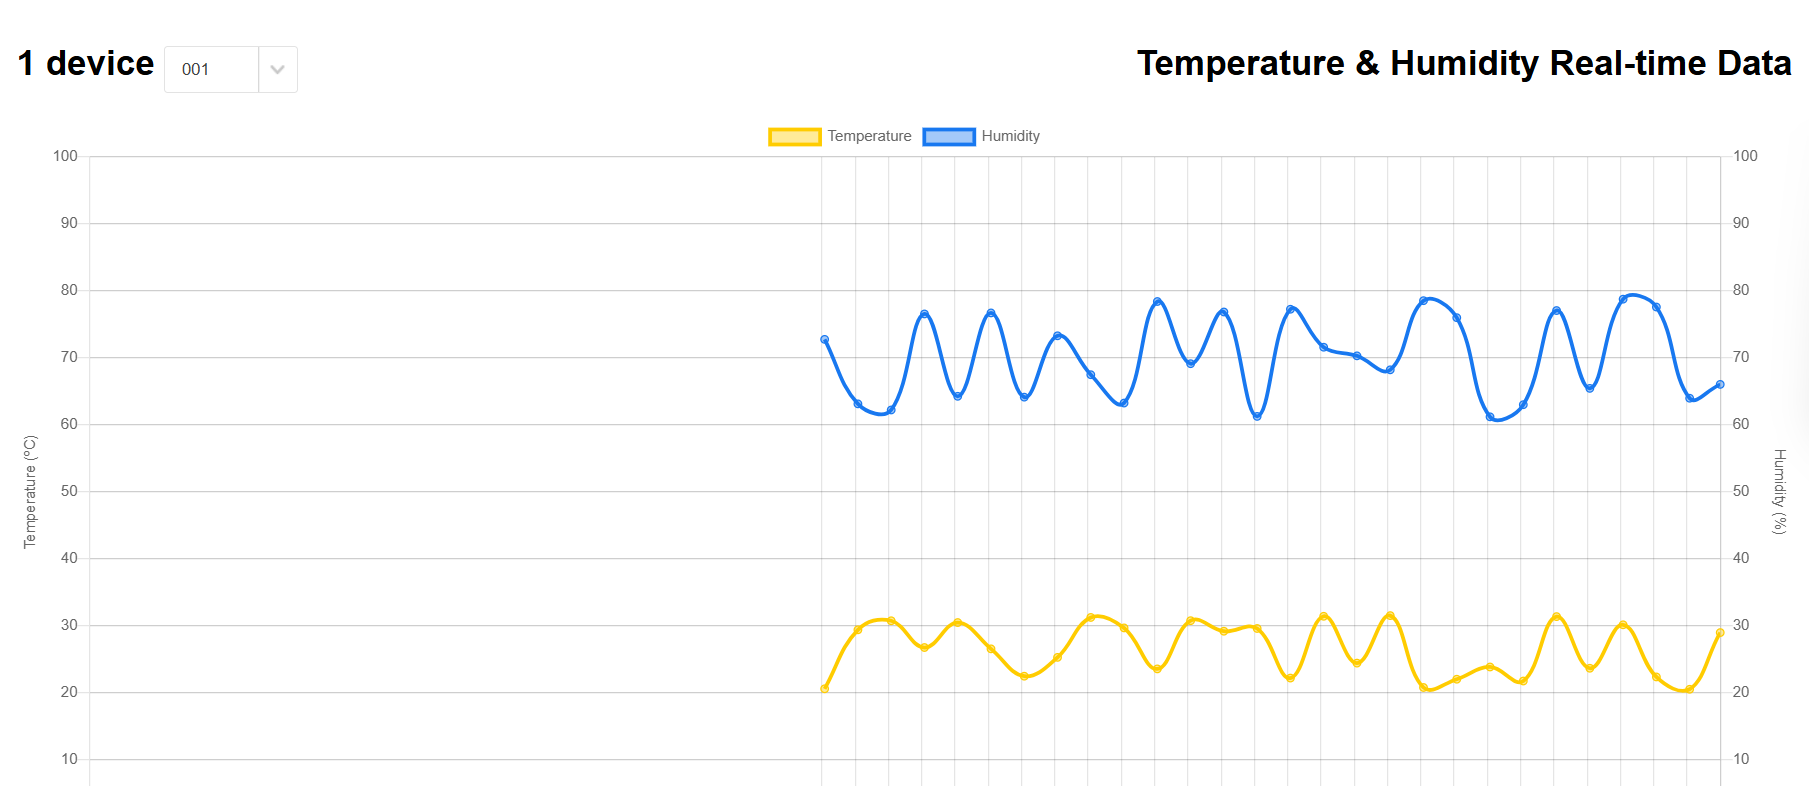
The Git clone URL here can be seen on the main interface of the Deployment Center. During the final push step, enter the credential username and password you just created to complete the deployment. Return to the web app’s Overview interface, click on the Default domain link, and open it to see the real-time sensor data, as shown in the figure:
 wechat